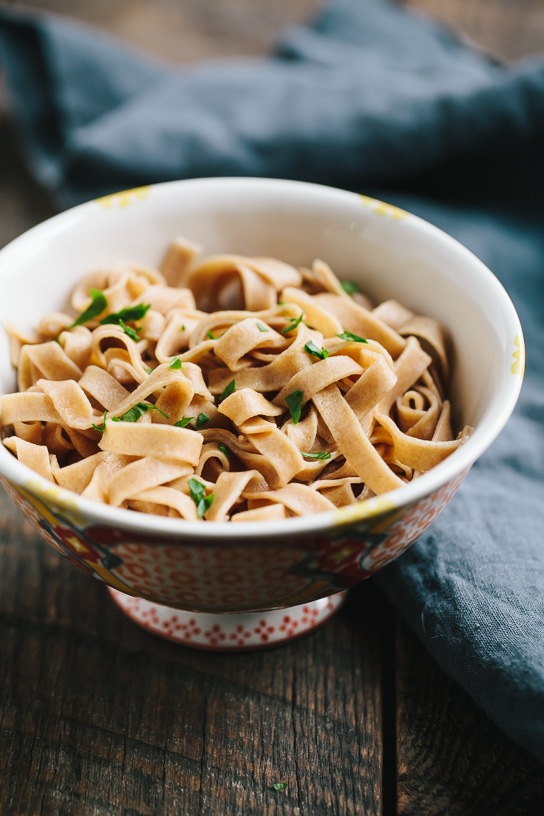
For years I kept the pasta maker that was passed down from Ryan’s grandmother stashed away in the back of our pantry where it was easily forgotten. The whole process of homemade pasta making seemed intimidating and tedious and the pasta maker remained untouched for the longest time. Homemade pasta had been near the bottom on my long list of recipes to try. Then all of the sudden last year, the idea of making my own pasta intrigued me. I finally tried it and oh my goodness, homemade pasta takes pasta to a whole new level. Spelt flour has been a favorite to bake with for some time now and I also love it in this pasta. It gives the pasta a slightly nutty flavor without having an overwhelming wheat flavor. Realistically, fresh homemade pasta will not be the new normal around here, but it is a special treat once in a while. It does take some time, but it’s really not as much work as I had expected. There are two methods to making the dough- by hand or with a mixer or food processor. From my experience, I’ve had consistently better results when I make it by hand.
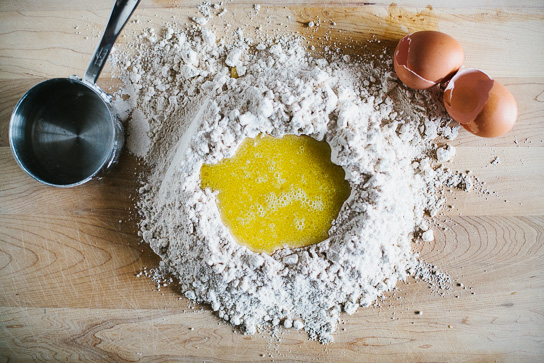
First, make a well in a mound of flour and fill with the lightly beaten eggs and olive oil. Use a fork to gradually incorporate the flour, starting in the middle and working outwards.
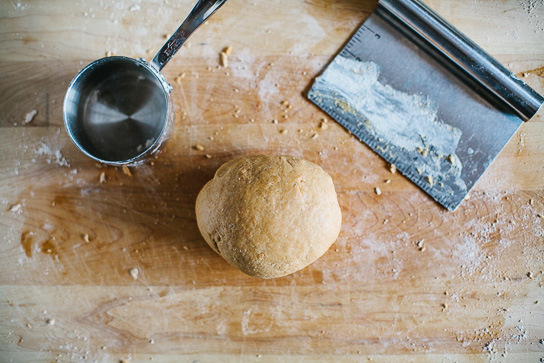
Knead the dough together by hand until the dough is smooth and flexible. Form the dough into a ball and allow to rest.
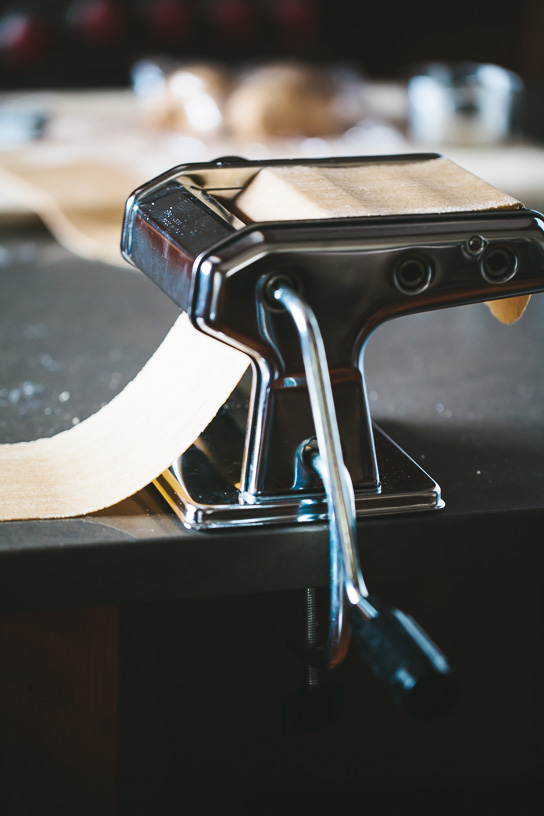
Make flat sheets of pasta through one side of the pasta machine.
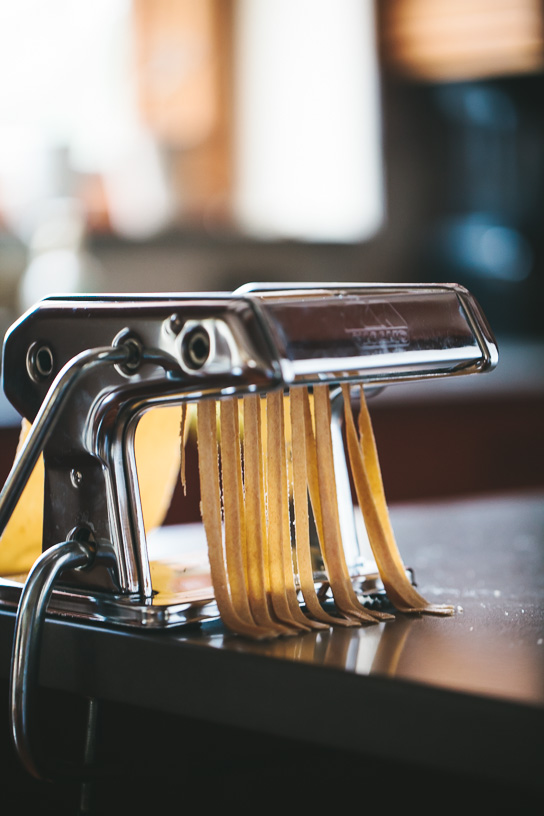
Then cut those sheets into strips of noodles with the other side.
You have pasta!
Print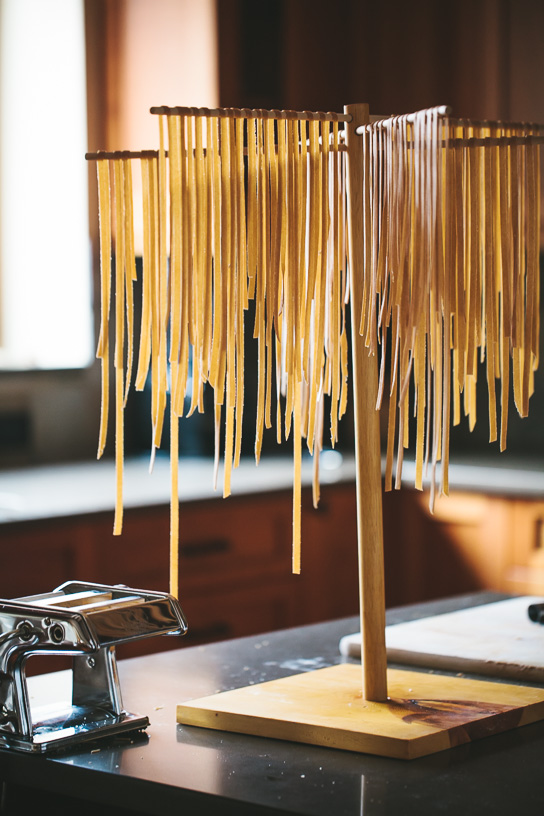
Spelt Pasta

Ingredients
- 2 1/2 cups whole spelt flour (10 ounces)
- 1/2 teaspoon fine grain sea salt
- 2 large eggs, at room temperature
- 2 tablespoons extra-virgin olive oil
- 3-6 tablespoons water
Instructions
- Make a mound of flour and sprinkle the salt across the top. Use a spoon to create a well in the center of the mound.
- In a liquid measuring cup, lightly whisk together the eggs, olive oil, and 3 tablespoons of water. Pour the mixture into the well. Using a fork and a circular motion, gently incorporate the flour starting from the center and working outwards until all of the flour is incorporated. Knead the dough with your hands, adding more water 1 tablespoon at a time if necessary, until you can form a soft ball of dough. Continue to knead for 5-10 minutes until the dough is smooth and flexible. Form the dough into a ball and cover with a glass bowl or plastic wrap. Allow dough to rest and relax for 30-60 minutes at room temperature.
- Secure pasta machine to the edge of a countertop. Divide dough into quarters. Take one of the quarters and keep the remaining three quarters covered. Flatten and shape the piece of dough into a rough rectangle. Start with the rollers on the thickest setting (this is #1 on my pasta machine) and roll the dough through the machine. Fold the dough into thirds towards the center of the rectangle. Roll the dough through the machine again starting with the open end of the dough. Fold and repeat once more. Continue rolling the pasta through the machine, gradually adjusting to the thinner settings. I like to roll the dough twice through at each setting and I stop at #4 on my pasta machine. After #3, the dough becomes quite long and I cut the dough in half to make the length more manageable.
- Choose the size noodles you would like from the opposite side of the pasta machine and roll the thin sheets of pasta through the machine to cut into noodles. Allow pasta to dry on a pasta rack.
- Repeat steps 3 and 4 with the remaining quarters of dough.
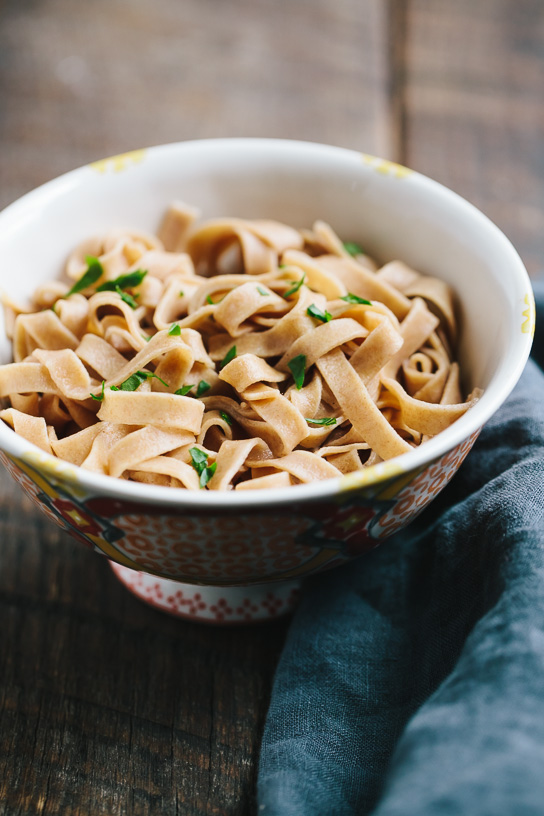
- To cook the pasta, bring a large pot of salted water to a boil. Add the pasta and stir immediately to avoid sticking. Boil 2-4 minutes, until pasta floats to the top and is tender.
Notes
very slightly adapted from Ancient Grains for Modern Meals
Continue Reading