• Skip to primary navigation
  • Skip to content
  • Skip to primary sidebar

Main navigation

  • Home
  • About
  • Recipes
  • Portfolio
  • Contact
  • Bloglovin
  • Facebook
  • Instagram
  • Pinterest
  • RSS

July 10, 2014

Fig, Honey, Pistachio, and Goat Cheese Quesadillas

Fig, Honey, Pistachio, and Goat Cheese Quesadillas

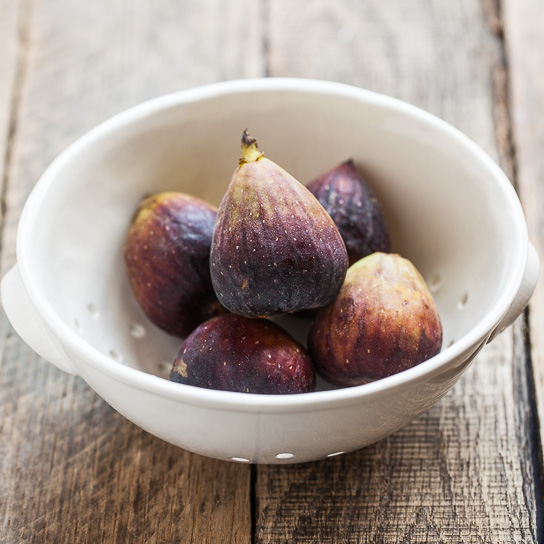
Last week Ryan and I were able to go on a mini getaway to northern Michigan to celebrate our 10 year anniversary.  We spent our time reflecting on God’s faithfulness, going on peaceful walks, hiking beautiful sand dunes, and of course, eating delicious meals.  One of the salads we most enjoyed was a simple plate of fresh figs, pistachios, and goat cheese arranged on a scattering of greens.  It was simple and yet such an excellent combination.  It made me think of The Sprouted Kitchen’s Strawberry and Leek Quesadillas and I knew I wanted to try some of these salad ingredients in quesadilla form.  Along with sliced figs, soft goat cheese, and pistachios, I also added some raw honey to bring out the sweetness of the figs.

Fig, Honey, Pistachio, and Goat Cheese Quesadillas

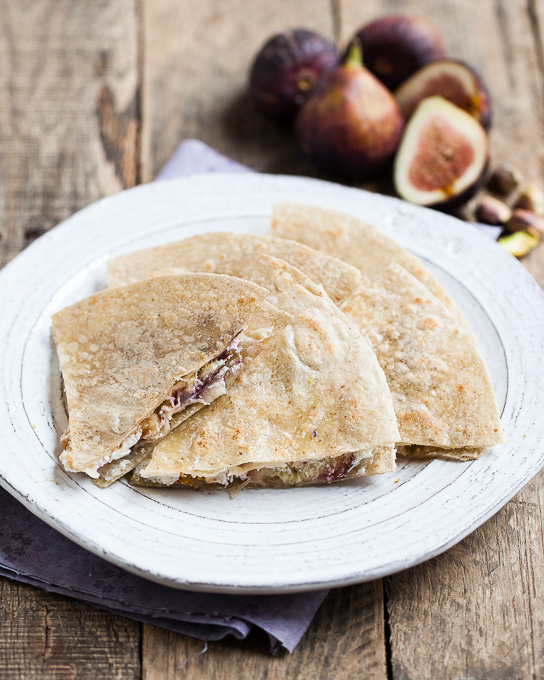
Just as in these Strawberry and Leek Quesadillas, I recommend using brown rice tortillas for these Fig, Honey, Pistachio, and Goat Cheese Quesadillas because they turn extra crispy when heated and it provides a nice contrast to the soft figs and goat cheese.  This would make a lovely hors d’oeuvre for any type of festive gathering!

Print

Fig, Honey, Pistachio, and Goat Cheese Quesadillas

Fig, Honey, Pistachio, and Goat Cheese Quesadillas

Ingredients

  • 2 brown rice tortillas
  • 1/3 cup soft goat cheese
  • sliced fresh figs
  • shelled pistachios
  • 1 tablespoon raw honey

Instructions

  1. Spread goat cheese on one of the tortillas and layer with sliced figs and pistachios. Spread a thin layer of raw honey on the other tortilla and place honey side down on top of the tortilla with the figs, pistachios, and goat cheese.
  2. Heat both sides on a buttered griddle or pan over medium heat for 2-3 minutes per side, until tortillas become lightly browned and crispy. Cut into wedges and serve.

Notes

inspired by The Sprouted Kitchen

Continue Reading

July 7, 2014

Wheatberry Salad

Wheatberry Salad

 Like so many home cooks, Barefoot Contessa cookbooks are among my favorites.  Ina Garten prepares her food with such style and flair and I’ve learned so much from her books.  This wheatberry salad comes from her Barefoot Contessa Family Style Cookbook.  Wheatberries are a chewy whole grain and have a slightly nutty flavor.  I love bringing this salad to potlucks or picnics because it tastes great at room temperature and nothing gets wilted or mushy.  I’ve been making this for several years now and I never get tired of it!

Wheatberry Salad

Print

Wheatberry Salad

Wheatberry Salad
  • Yield: 4-6 side portions

Ingredients

  • 1 cup hard winter wheat berries
  • 1 cup finely diced red onion, about 1 medium onion
  • 3 tablespoons olive oil, divided
  • 2 tablespoons balsamic vinegar
  • 3 scallions, minced
  • 1/2 red bell pepper, small diced
  • 1 carrot, small diced
  • 1/2 teaspoon kosher salt
  • 1/4 teaspoon ground black pepper

Instructions

  1. Boil 3 cups of salted water in a saucepan. Add the wheat berries and cook, partially covered, over low heat for 40-45 minutes. Wheatberries should be soft, but still chewy when they are done. Drain and set aside.
  2. Heat 1 tablespoon of olive oil over medium heat. Add the red onion and saute until the onion softens and becomes translucent, about 5 minutes. Turn off the heat and add the remaining 2 tablespoons of olive oil and balsamic vinegar. Stir together with the onion.
  3. In a large mixing bowl, mix together the wheatberries, scallions, red pepper, carrot, salt, and pepper. Add the sauteed onion and mix again until the wheatberries are evenly coated with the olive oil and balsamic vinegar. Allow the salad to stand at room temperature for at least 30 minutes before serving so flavors can meld. Season with additional salt and pepper to taste.

Notes

barely adapted from Barefoot Contessa Family Style


Continue Reading

June 30, 2014

Buckwheat Granola {with Dried Cherries and Cacao Nibs}

Buckwheat Granola | Gather and Dine

 I recently came across Emmy’s Super Cereal on some recent travels and decided to buy a box as a snack for the road.  The cereal is basically sprouted buckwheat sweetened with coconut sugar and then dehydrated until the buckwheat becomes super crunchy and toasty. So delicious and satisfying!  I immediately began thinking of all of the things I could do with toasted buckwheat.  Despite having the word “wheat” in it, buckwheat is actually a seed and not part of the wheat family.  It is full of nutrients and also gluten-free.

Buckwheat Granola | Gather and Dine

This buckwheat granola comes together quickly and your whole house will smell wonderful as it bakes.  I’ve always liked the idea of sweetening my granolas with coconut sugar, but I’ve always had problems getting the coconut sugar to dissolve and it always ended up very granular.  This time I made a simple syrup from the coconut sugar by dissolving it in some water before mixing it with the coconut oil and that worked beautifully.  The buckwheat ended up being lightly sweetened with just a hint of coconut flavor from the sugar and oil and it remained crunchy for days when stored in an airtight container.  The flavor combinations for this are endless.  Substitute any type of dried fruit for the cherries and add nuts in addition to or instead of the cacao nibs.  I love cacao nibs, but my kids are not big fans so I made them a cherry and sliced almonds version and they loved it!

Buckwheat Granola | Gather and Dine

Print

Dried Cherry and Cacao Nib Buckwheat Granola

Buckwheat Granola | Gather and Dine

Ingredients

  • 1/4 cup coconut sugar
  • 2 tablespoons water
  • 3 tablespoons coconut oil
  • 1/2 teaspoon vanilla
  • 1/8 teaspoon sea salt
  • 2 cups raw buckwheat groats
  • 1/3 cup dried cherries, chopped
  • 1/4 cup cacao nibs

Instructions

  1. Preheat oven to 300.
  2. in a small saucepan, combine the coconut sugar and water and whisk together over low heat until coconut sugar is completely dissolved and mixture becomes a simple syrup. Add the coconut oil and whisk together until coconut oil is completely melted. Remove from the heat and add the vanilla and salt.
  3. Spread the buckwheat groats and dried cherries out on a large rimmed baking sheet. Pour the coconut sugar mixture over the buckwheat and dried cherries and stir with a wooden spoon until buckwheat and cherries are evenly coated.
  4. Bake for 35-45 minutes, stirring every 10-15 minutes, until buckwheat becomes light golden brown.
  5. Cool completely on pan, stirring occasionally to avoid clumps. Mix in cacao nibs. Transfer to an airtight container for storage.
Continue Reading
  • « Previous Page
  • Page 1
  • …
  • Page 64
  • Page 65
  • Page 66
  • Page 67
  • Page 68
  • …
  • Page 75
  • Next Page »

Primary Sidebar

wholesome recipes

made for sharing

browse

posts

Categories

Archives

Your

favorites

  • Greek Marinated Pork Tenderloin with Tzatziki
  • Easy Baked Ginger Chicken | Gather & Dine
  • Ginger Chicken Brown Rice Congee
  • Korean-Style Chicken Cucumber Sandwiches with Gochujang Mayo

Subscribe

by email

This error message is only visible to WordPress admins

Error: No feed found.

Please go to the Instagram Feed settings page to create a feed.

Follow

on instagram

© GATHER AND DINE 2026. SITE DESIGN BY WOODEN SPOONS KITCHEN